Showing posts with label Paleo snack. Show all posts

Wednesday, February 1, 2012

Paleo Granola MIx

I am a new (once again) mom, as you know! I am a nursing mom who needs calories, proteins and snacks to help keep milk production up! I love trail mix or granola because it is a quick grab! 

Here is a delicious snack or cereal... perfect for on the go!!! I am going to play with it a little more next time I make it. Might add some dates or dried fruits. 

and I will not over cook it!!! Yes, I over cooked this batch because baby needed me! :) It almost was a FLOP! :) 


The Ingredients:Dry
1/2 cup ground flax seeds
1 cup raw pumpkin seeds (pepitas)
1 cup raw sunflower seeds
1 1/2 cups almond meal
3 cups shredded unsweetened coconut
4 cups raw slivered almonds
1 tsp cinnamon
1 tsp sea salt
1/2 tsp baking soda
Wet
1 cup liquified coconut oil
1/2 cup raw organic honey
3 tsp pure vanilla extract


The Directions:

  1. Preheat oven to 250 degrees.
  2. Combine all dry ingredients in a large bowl. Mix well to ensure ingredients are evenly distributed.
  3. In a medium bowl, add wet ingredients and whisk together until well combined.
  4. Mix the wet ingredients thoroughly into the dry ingredients. 
  5. Divide the mixture in a thin layer onto two rimmed baking sheets. It will fill about 1 and 1/2 jelly roll pans.
  6. Press mixture down with your hands or the back of a large spoon.
  7. Bake until lightly toasted, approximately 1 hour. Remove pans from oven and gently stir the mixture with a large spoon. Carefully return warm pans to the oven and continue to cook for another 15 minutes.
  8. Remove from oven and stir in optional ingredients, if desired. Let the mixture cool completely in the pans. 
  9. To store, place a folded paper towel (to absorb any excess coconut oil) in the bottom of a lidded storage container. Add paleo crunch to container and cover. Enjoy plain or with coconut or almond milk.
ENJOY!!!!

Wednesday, September 14, 2011

Kale Chips time!

Last week we got some delicious Kale in our CSA food share. I love Kale and I love making Kale Chips!!! They are so delicious and simple to make and full of great vitamins! 


The Ingredients:
Cashew Cheese

1/2c unsalted cashews
1/4c nutritional yeast
1T coconut oil

A bunch of Kale


The Directions:
Wash and Dry Kale. Preheat oven to 170 degrees - or the lowest oven temperature. 

I laid the Kale out on a cookie sheet and spray the Coconut Oil over the Kale. 

In a bowl, I mixed the Cashew Cheese and the sprayed Kale. Coating the Kale with the Cashew Cheese. 

I then poured the Kale back on the cookie sheet and sprinkled the remaining Cashew Cheese on the Kale. Then I sprayed the Kale one more time with the Coconut Oil. 

I did not have a full bunch of Kale. I baked mine at 170 degrees for about 1 1/2 hours. Just watch the Kale until crispy. 

ENJOY!!!

Wednesday, July 27, 2011

Granola

Well, I tried to make a new and improved nut bar this week but it turned into a granola snack! :) It was still delicious but I was really hoping to improve my nut bars take 1, and nut bars take 2. I was trying to add coconut cream and take out a lot of the sugar (molasses, honey, etc!)

I guess without them the bars just will not stick together. :)

Once again, I forgot to take a picture and the granola did not last long!

The Ingredients:
Almonds, chopped
cashews, chopped
walnuts, chopped
sunflower seeds
cranberries
chai seeds
5 dates, pited, chopped
1 TBSP Sunflower seed butter
1 TBSP Coconut Oil
1 TBSP Coconut Cream
1 TBSP Coconut Butter
1 TBSP Raw Honey

The Directions:
Mix all the ingredients together and pour into a greased 9x9 glass dish.

Bake at 350 degrees for 20 minutes.

Let cool and then ENJOY!!!

Saturday, May 7, 2011

Venison Jerky

A few weeks back, when our freezer went out, AGAIN... I made Venison Jerky out of Venison Loin. 
This time the marinade was Djion Mustard, Olive Oil, Garlic, and a very little Coconut Aminos.

I used the same cooking process as the Beef Jerky. I think it would have turned out perfect had I did the same "typical" flavoring for jerky and  used a dehydrator instead of the oven.

Tuesday, April 12, 2011

Nut Granola Bars, take 2

My first nut granola bars, were and are a huge hit. I have had emails, comments and even fellow bloggers have blog the recipe on their sites. They are a huge hit with you and an even bigger hit at our house. 

I have been playing around with the recipe and I came up with another keeper! 
The Ingredients:
1 cup Almonds
1/2 cup Pecan
1 cup Cashews
1/2 cup pumpkin seeds
1/2 cup sunflower seeds
1/4 cup cranberries
1/4 cup chocolate chips (dairy-free, nut-free, grain-free)
1/4 cup coconut flakes
1/4 cup raw honey
1/4 cup coconut butter
1/4 cup Coconut Oil

The Directions:
Add Almonds and Pecans into the food processor and rough chop. Pour them into a bowl and add pumpkin seeds, sunflower seeds, cranberries and coconut flakes.

In a sauce pan add raw honey, almond coconut butter, coconut butter and coconut oil. Once it is smooth and creamy add the nuts. 

Pour mixture into a 8x8 (with parchment) pan and spread evenly. Put in freezer for 2 hours to chill and set. 

** Leave the nuts chunkier. You may need to adapt the amount of the liquid. Too much liquid will leave the bars more gooey. 

Thursday, March 24, 2011

Almond Coconut Butter

Kid lunches
Sweet Potato chips (homemade), carrots, strawberries and turkey

I am really excited about telling you my creation/mistake-turned WONDERFUL!!!
I was playing around with my vitamix. I started with some coconut. I was going to attempt coconut butter, again! When I started mixing, I quickly realized that it was not going to work again. (didn't have enough coconut) Thinking quickly, I added Almonds and coconut oil. Blended for awhile and came up with this delicious creation! The Almond Coconut Butter was fabulous. It hardened in the fridge because of the coconut but has a very creamy feel because of the Almonds!

This is a must try!!!

Part of Pennywise Thursday, Monday Mania

Saturday, March 12, 2011

Hard Boiled Eggs

What do you see??? 

Have you ever made hard boiled eggs and the yolks are a grey, ugly, color??? 
Do you know the grey is your fault??? 

Let me tell you a little secret about making hard boiled eggs...

1 - FRESH eggs. This might seem silly to some but did you know, store bought eggs are sometimes months old? The eggs I get are day (s) old. Farm fresh eggs have bright yolks and the the whites are thicker. The shells are even harder to crack. 

2 - ICE WATER - Boil the eggs for 15 minutes as soon as you are done plop the eggs in ice water helps keep the bright yellow color vs. the grey color (see above picture)

These are great for snacks, lunch and side. We love boiled eggs. 

Friday, January 21, 2011

Nut Granola Bars

I mastered the Zucchini Spaghetti this week! If you remember, in this post, I made slices of zucchini. It was good but this time I used my mandolin and julienne cut the zucchini... 

DELICIOUS!
I added 1 cup of diced tomatoes to the sauce. 

Want some better news??? 
I made granola bars for my boys... no oatmeal and no corn syrup 

Don't those look wonderful?

The Ingredients:
1 cup Almonds
1 cup Pecan
1/2 cup pumpkin seeds
1/4 cup sunflower seeds
1/4 cup cranberries
1 TBSP coconut flakes (I would have used more but I only had a TBSP)
1/2 cup raw honey (1/4 cup honey 1/4 cup molasses) I might only do a total 1/4 cup next time
1/4 cup Coconut Oil

The Directions:
Add Almonds and Pecans into the food processor and rough chop. Pour them into a bowl and add pumpkin seeds, sunflower seeds, cranberries and coconut flakes.

In a sauce pan add raw honey, almond butter and coconut oil. Once it is smooth and creamy add the nuts. 

Pour mixture into a 8x8 (with parchment) pan and spread evenly. Put in freezer for 2 hours to chill and set. 

ENJOY!!!! 

Thursday, January 6, 2011

Beef Jerky


I love sharing! I love passing along recipes! I love creating and sharing! 
THAT IS WHO I AM!!! I am a sharer, after all, sharing is caring! :) 

I have spent the last day or so wondering -- do I really want to share this DELICIOUS jerky with you???

Lucky for you -- I don't like secrets! and I do want to share!!!!


Beef Jerky is a great snack and is a favorite for those doing Paleo. A great snack or even source of protein for lunch. 

I have been in search for a quality beef jerky recipe that I could season myself and dehydrate in my oven.  I do not need another kitchen gadget - although I still have two in mind! :) 

Recipes I found called for flank steak or a couple other cuts. 

I tried two different kinds of beef cuts. I talked to my farmer Jack from J and J and he recommended two cuts and I wanted to find the BEST! I did them both! Round Steak and Chuck roast. Round Steak was good but was harder for me to cut. Still was good!

CHUCK ROAST WINS!!!!! 
hands down

Chuck Roast was easier to cut into bigger thinner pieces and it was just easier to handle. 

 The meat sat in the marinade in the fridge overnight.

Laid the meat out on a cooling rack on top of foil wrapped cookie sheet.

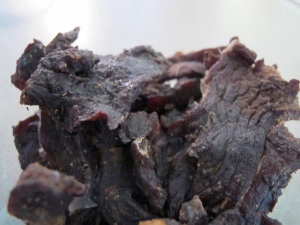
After 4 1/2 hours ---- BEEF JERKY!!!!

The Ingredients:
1 Chuck Roast (Mine was about 4 - 5 lbs)
2 tsp Lemon Pepper
1 tsp Sea Salt
1 tsp Fresh Ground Pepper
3 - 4 garlic cloves, minced
1 cup soy sauce like product (Coconut Aminos, Braggs Amino, Soy Sauce)


The Directions:
I started with frozen meat. Some recipes say partially thaw meat then cut. I tried both partial thawed meat and thawed meat. Thawed meat cut easier, for me.


 When ready - Preheat oven to 170 degrees. 
Slice meat into 1/10th inch thickness strips. (If you need to use a meat hammer - GO FOR IT!!!)

Mix the coconut aminos with minced garlic in a bowl.
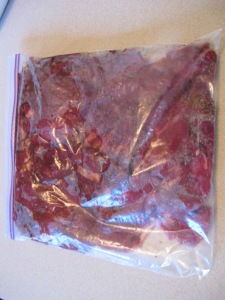
Toss sliced beef into with the coconut aminos and minced garlic in a ziploc back.
Allow meat to marinate from 2-24 hours in refrigerator.

*If using an oven, set up racks over cookie sheets lined with aluminum foil (for easier cleanup).
Lay strips of beef out on racks, add salt and pepper if desired, and place racks in oven.

Cook at 170 for 4-6 hours. Thinly sliced meat will take less time, thicker sliced meat will take longer. Open oven door slightly for last ~2 hours.

Hint - I flipped my meat around hour 2. I did not leave my door open because of my small children.
Also, on the thicker pieces of meat --- use the meat hammer!!!It works WONDERS!!!
_____________________________
I almost forgot --- Have you visited 12 Months of Bliss yet???
If not - a great time to start!!!! It is a New Year!!!!

***Thank you, sweet friend, for starting such a wonderful blog!!! I really enjoy each months challenge!

This months challenge - a picture a day! Simple!!!!
I need to start getting a little more creative with my pictures! So far - 2 pictures of my boys and about 10 of food.

It has been 6+month now of Bliss and I am still loving the challenges!!! :) Let me know what you think!!!! I really think you should join and start having BLISS!!! :)
Alright - go now!

Linked to Monday ManiaNourishing GourmentgnowfglinsSpain in Iowafoodrenegade

Wednesday, October 27, 2010

Kale Chips with Cashew Cheese

Tuesday is Glee Day! Yes, I am a Gleek! Proud of it!!! This Tuesday was the Rocky Horror Halloween Special which required planning. I scheduled the boys baths and bedtime a little earlier to insure they were down for the night once Glee started. 


I even made a special snack for this weeks Glee! Cheesy Kale Chips!!!! When I posted my Kale Chip recipe, several people shared their love for Cheesy Kale Chips. Being new to Kale Chips, I had NEVER heard of Cheesy Kale Chips. I was missing out!!! 

It wasn't until a couple of weeks ago that I really realized I was missing out!!! While shopping at Whole Foods, I saw a bag of Cheesy Kale Chips. I bought them. (Way over priced but worth a taste test!)

 I LOVED THEM. I ate the whole bag in one sitting. I knew that it was time for me to make my own Cheesy Kale Chips.


When looking back to my plain Kale Chips recipe, I remembered they took a long time. The texture was not exactly wheat was described in the recipes I read and the pictures I saw. The Kale Chips were left soggy and I had to re-cook them the next day.


I decided to go a little different route this time with a little help from Tasha. When discussing Kale Chips, she said she was going to go with Coconut Oil.  I still thought Coconut Oil could leave them a little soggy too so I used Coconut Oil Cooking Spray. I decided that the weight of the oil made them soggy and not crispy which then made me cook the Kale longer.


It worked!!!! These Cheesy Kale Chips tasted just like the store bought ones, if not better! I ate them all!!! I know terrible, but they were warm and delicious!!!!


The Ingredients:


Cashew Cheese
1/2c unsalted cashews
1/4c nutritional yeast
1T coconut oil

A bunch of Kale


The Directions:
Wash and Dry Kale. Preheat oven to 170 degrees - or the lowest oven temperature. 

I had extra Cashew Cheese from the Southwestern Sweet Potato and Black Bean Burritos and just used what I had left. 

I laid the Kale out on a cookie sheet and spray the Coconut Oil over the Kale. 

In a bowl, I mixed the Cashew Cheese and the sprayed Kale. Coating the Kale with the Cashew Cheese. 

I then poured the Kale back on the cookie sheet and sprinkled the remaining Cashew Cheese on the Kale. Then I sprayed the Kale one more time with the Coconut Oil. 

I did not have a full bunch of Kale. I baked mine at 170 degrees for about 1 1/2 hours. Just watch the Kale until crispy. 

ENJOY!!!

Wednesday, June 2, 2010

Carrot Crackers

We have a 2 year old in the house. We are lucky because he LOVES him some vegetables and I really do not need to "hide" vegetables in other foods. There are times where he wants crackers or bread or something that I do not necessarily want him to consume a lot of - so I will make him something homemade.

Several months a go I ran across a Zucchini Cracker recipe in one of my RAW cookbooks and thought they sounded delicious. Yesterday, I had some spare time and wanted to try to make some crackers. I found a recipe for Carrot Crackers and knew that my son would LOVE them. I had all the ingredients on hand and I am really impressed on how the crackers turned out. I have still not made the Zucchini crackers but they are on my list to try.


Raw flax seed crackers are a popular snack for those on raw food diet. Even if you're just looking to include more flax seed in your diet or more raw foods, try this dehydrated flax seed cracker recipe for a satisfying crunch. Flax seed crackers are great with raw salsa, raw guacamole or raw hummus (pictured). I like to add garlic salt to my flax crackers, but this may not be suitable for those on a 100% raw food diet.


The Ingredients:
3 clove garlic
2 tablespoon ground flax seed meal
½ cup almonds
salt and pepper
5 small organic carrots
The Directions:
ground almonds to make flower. put in food processor with carrots, garlic, flax seeds meal and salt and pepper to taste. process to mix.
make flat crackers and place on dehydrator sheets. dehydrate at 105 F for 10-12 hr. flip the crackers after 6 hr and continue dehydrating.
-OR-
I made mine in the over. I cooked the crackers on 170 degrees for 4 1/2 hours.
***Depending on your oven and where you live you may need to add more cooking time.
enjoy!

Related Posts with Thumbnails